


I scrapped most of the plastic pieces that weren't critical to functionality. Unfortunately, the bottom of the group head was made of plastic and part of the frame that I tossed. The group head is the cylindrical part that your portafilter fits into and is kind of an important part. Call upon... 3D printer!
 |
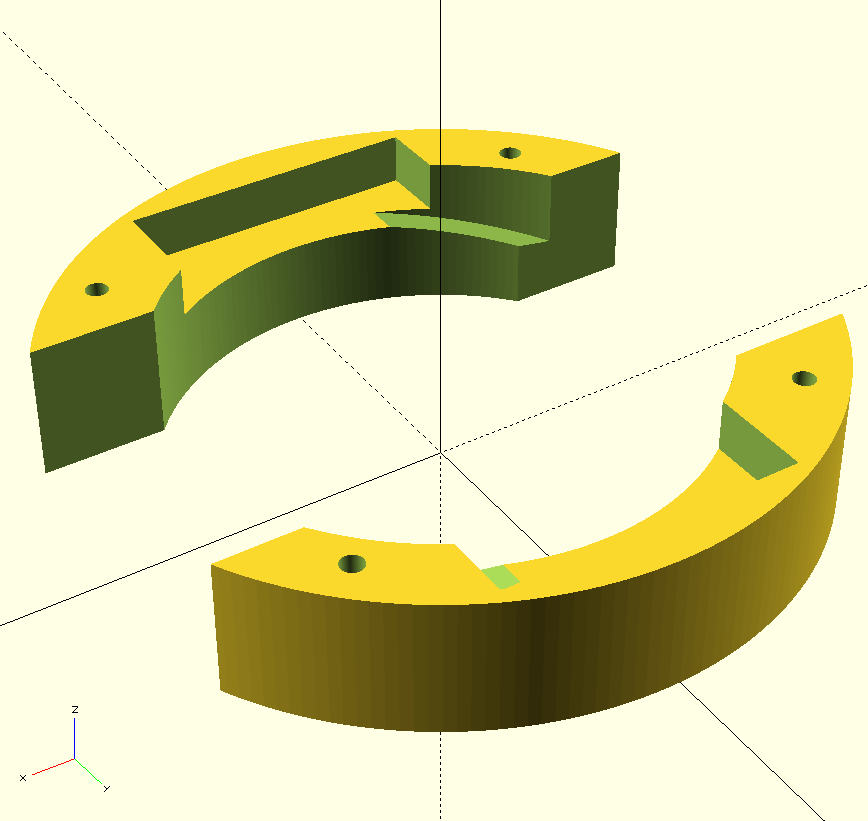
| Group head (aka Brühkopf) |
Group Head Design
I used a free software called OpenSCAD for building the design. With OpenSCAD you define the model using their coding language; mouse is only for navigating through your design. It may seem kind of intimidating at first but after some quick tutorials (and I mean quick) it was quite easy to get the hang of. Using the language (rather than mouse) forces you to be extremely precise in your measurements, something that is usually important when designing something to fit into the real world. The basics of the OpenSCAD language allows you to define shapes (cube, cylinder, sphere) and apply operations upon them (translate, rotate, scale).
| For example the following creates a simple cylinder with height 10 and radius 5: | |
| cylinder(h=10, r=5, center=true); | 
|
| If you wanted to create an oval shape instead, you would scale it non-uniformly: | |
| scale([1,2,1])
{ cylinder(h=10, r=5, center=true); } | 
|
| You can use the difference operation to remove pieces that you don't want. In this case I've removed a cube from the cylinder: | |
| difference() { scale([1,2,1]) { cylinder(h=10,r=5, center=true); } cube([5, 5, 11], center=true); } | 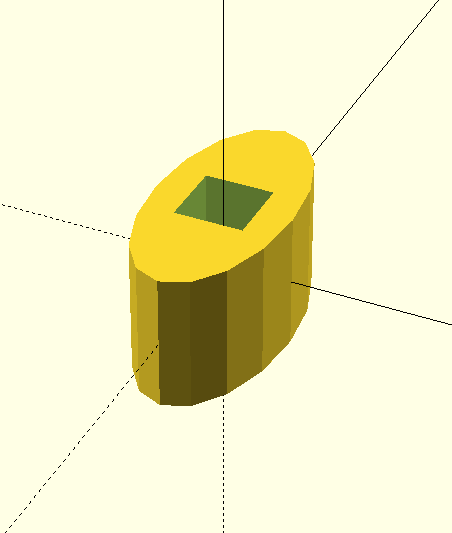
|
| You could even remove a piece of the piece you're removing and so on... (diff-ception): | |
| difference() { scale([1,2,1]) { cylinder(h=10,r=5, center=true); } difference() { cube([5, 5, 11], center=true); sphere(5.5); } } | 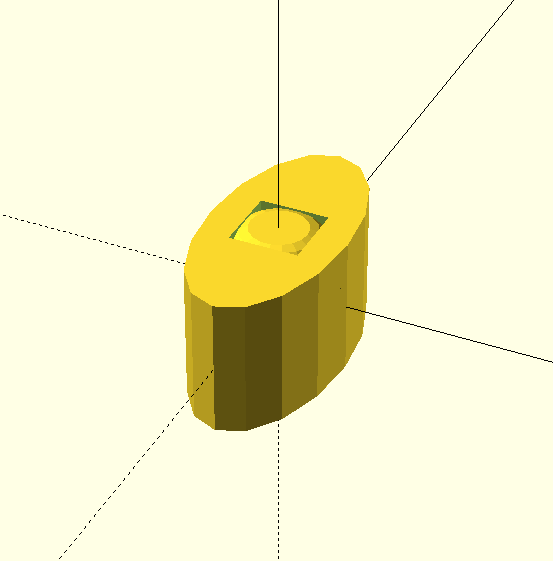
|
You can see how this could get messy quick. Just like with normal code, occasionally you need to refactor and simplify the design to make it elegant and manageable.
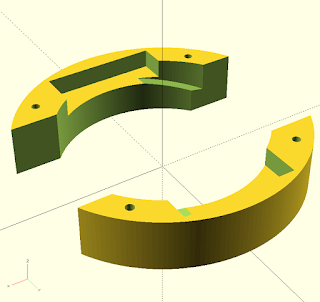 |
| The final design |

The biggest problem that I found when building something that will fit into a real-world thing, was testing it. How do I make sure that the screw hole I placed using my imprecise measuring tape was in the correct location? A 2 millimeter wide hole just a millimeter off would prevent the entire thing from fitting. The solution (without a bunch of trial and error) was to calculate the measurements in multiple ways and check that the results matched.

 |
| Some of the makerbot 3D printers |
 |
| Raspberry Pi monitored plant |
 |
| Rocky Roboa |
Engineering Porn
The satisfying part finally came when the screws lined up with the threading and the portafilter rotated snugly into place.
 |
| Dat snap though |
Testing the machine was not as straightforward as I had anticipated. The first couple attempts were a failure due to the portafilter not forming a perfect seal with the rubber gasket. Keep in mind that an espresso machine works by shooting pressurized steam through tamped coffee. A typical espresso machine will build up 9 atmospheres of pressure when pulling a shot. That's 10 times the pressure of a consumer pressure cooker! I mistakenly designed the group head to fit the portafilter, but the gap actually had to be a bit undersized to apply enough pressure on the gasket to form a good seal. Imagine the fun of trying to unplug a pressurized bomb while it shoots jets of steam and boiling water out the sides; at you and the exposed electrical wires. After tightening the group head down further to form a good seal, the machine becomes slightly more terrifying as it's now allowed to build up even more pressure. I don't think that the PLA plastic that the group head was printed out of is intended to withstand high temperatures and pressure simultaneously. It was a fun project, but after my close encounter with face melting trajectories, I decided that buying a new espresso machine would be cheaper than skin grafts. If I ever "gift" you an industrial looking homemade espresso machine, it's most likely a passive-aggressive way to unfriend you.
More Reads
What's the worst that could happen with a pressure cooker?
I added the part I designed to thingiverse if you're interested in making your own 3rd degree burn machine.


This comment has been removed by a blog administrator.
ReplyDeleteThis comment has been removed by a blog administrator.
ReplyDeleteTo think of rebuilding the espresso machine is truly hard and time consuming. Got one on my cabinet hanging around for almost a month now since I bought a new one. I think I might give it a try to rebuild it again.
ReplyDeletehttp://www.espressocorner.net/category/best-espresso-machines